This page will be a running account of
progress on the Scout.
Last
updated:
04/05/2010
March
27-28,
2010
Attended the
AZIHR again this year. Got another first
place and ran the Hassyampa River.
Since I'm
only doing maintenance on the SR-2 now,
I won't post up anything more unless I
do some significant upgrades or changes.
March 28,
2009
Attended the
AZIHR in Wickenburg, AZ. Got a first
place for Mild Scout 800s and went on a
trail run up the
Hassyampa River.
November 16, 2008
After the
trip to
RMIHR, where I took a second
place for Mild Modified Scout 800s, I
went on a trail run to the
San Francisco River in eastern
Arizona with the Sonora Desert Scouts
club.
July 12,
2008
Got
everything reassembled and finished
applying the rocker and beltline vinyl
stripes. All ready for RMIHR!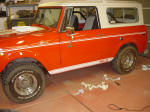
July 6, 2008
Shot the
finish coat on the body. There's less
than 2 weeks before we leave for RMIHR.
Gotta get everything back together and
apply the stripes.
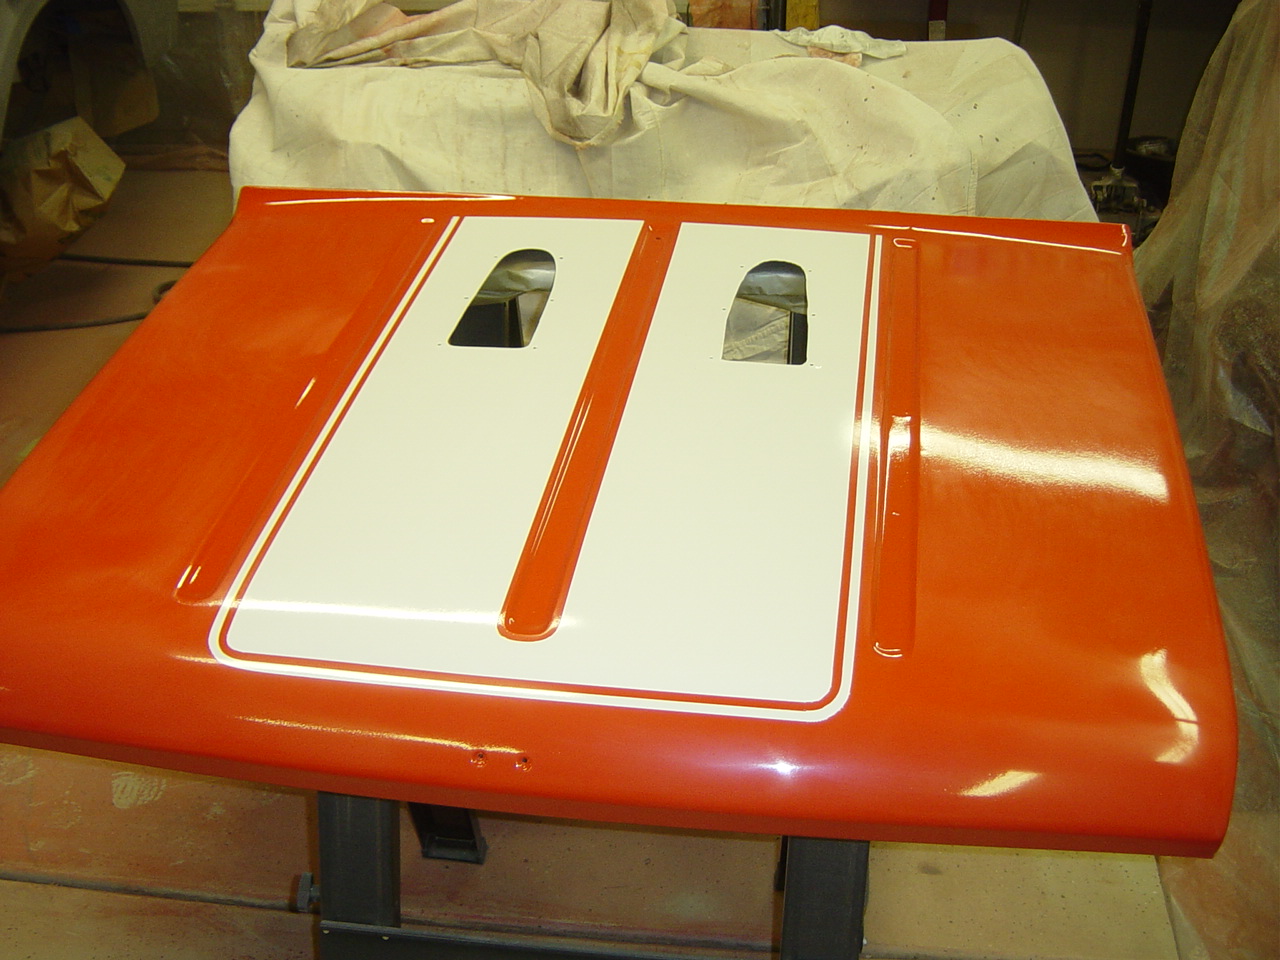
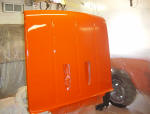
July 5,
2008
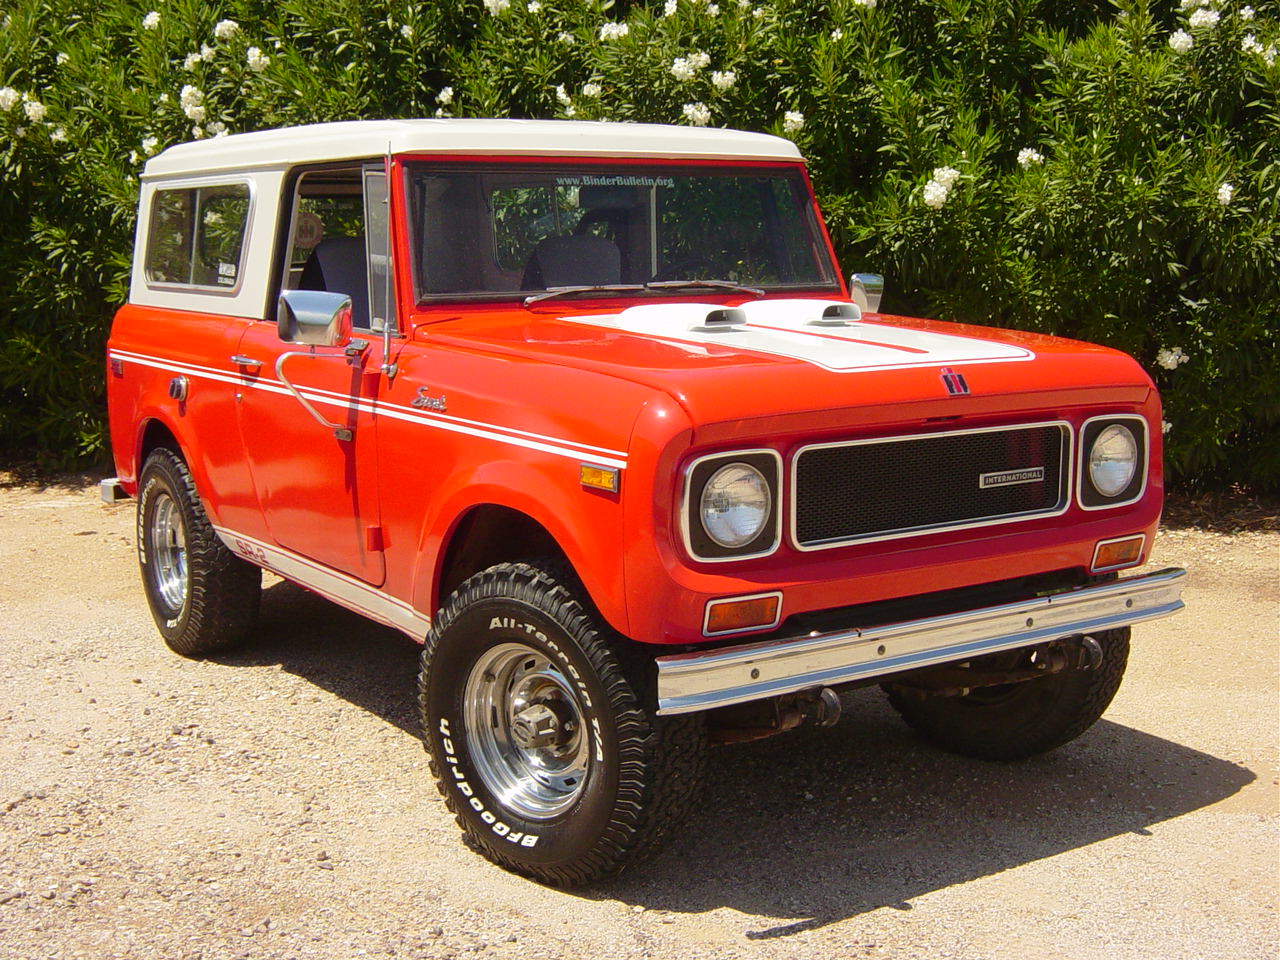
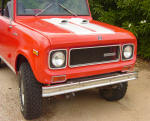
I laid out
the hood graphic and masked it off. I
used rattle can white Rustoleum enamel.
The graphic is not strictly to the
dimensions of the original SR-2 appliqu�
but it looks good enough for a
10-footer!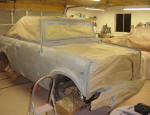
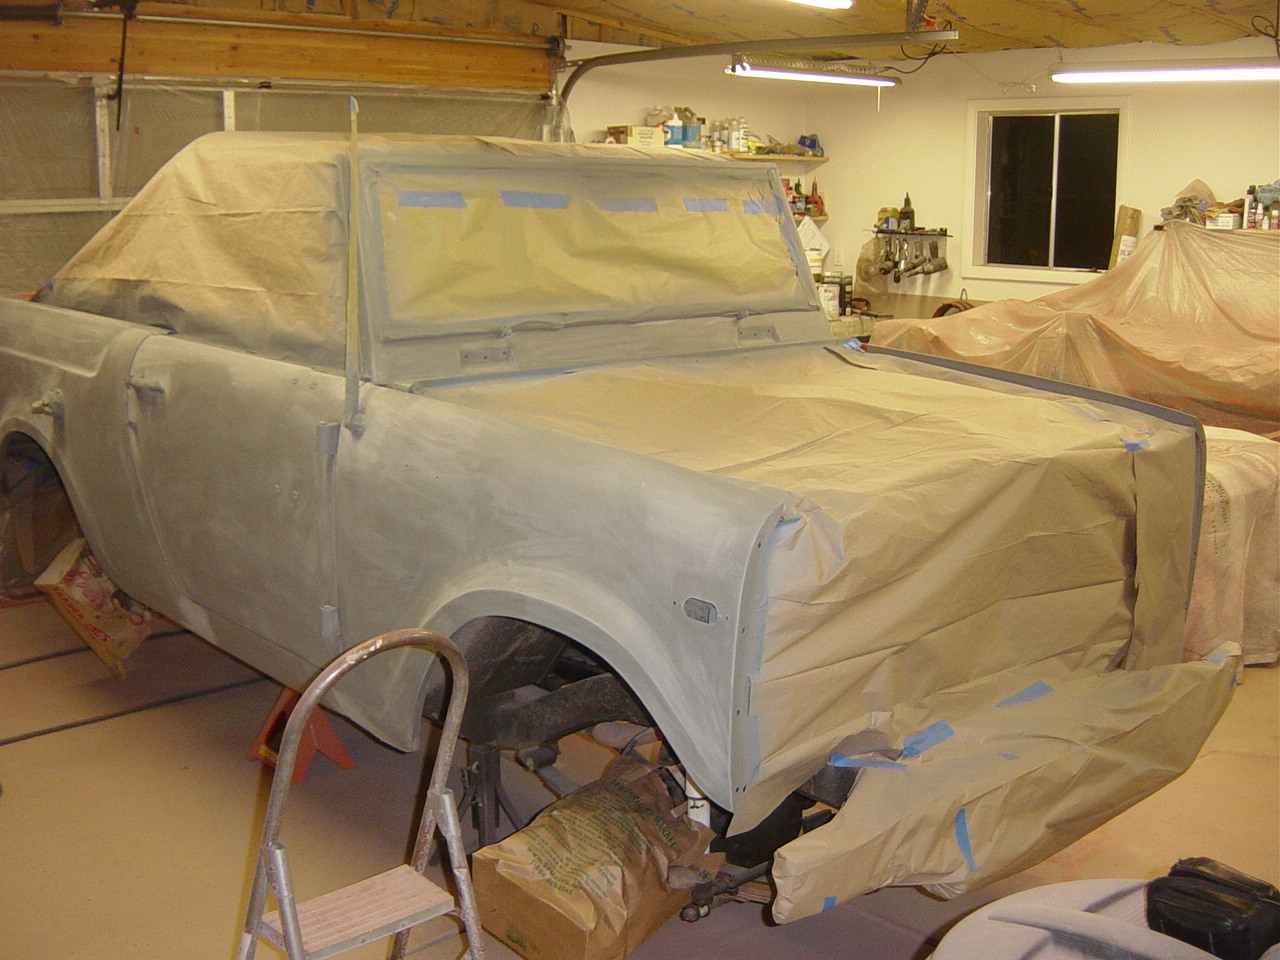
The body is
prepped and primered and ready for the
finish coat.
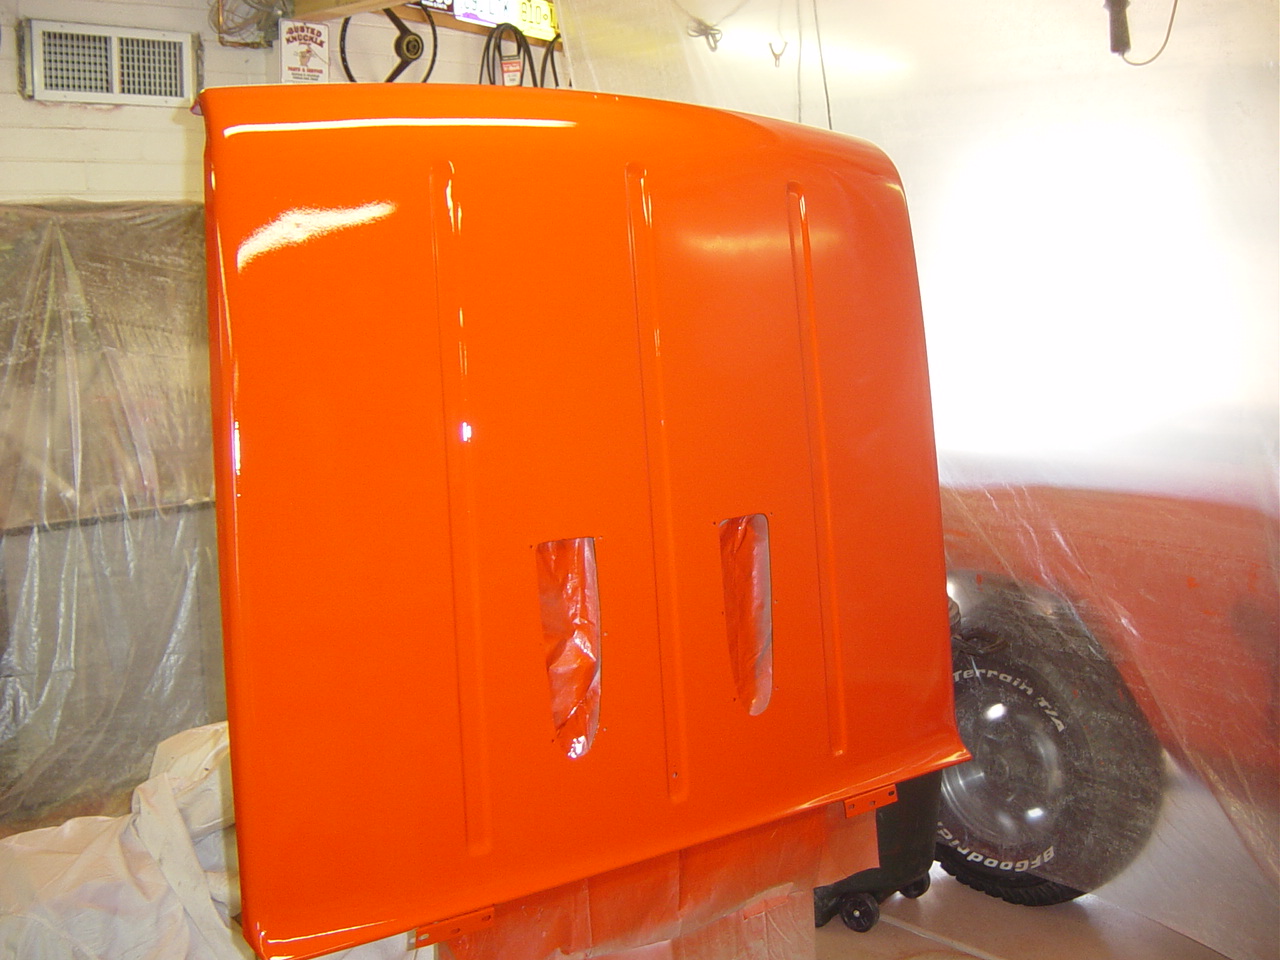
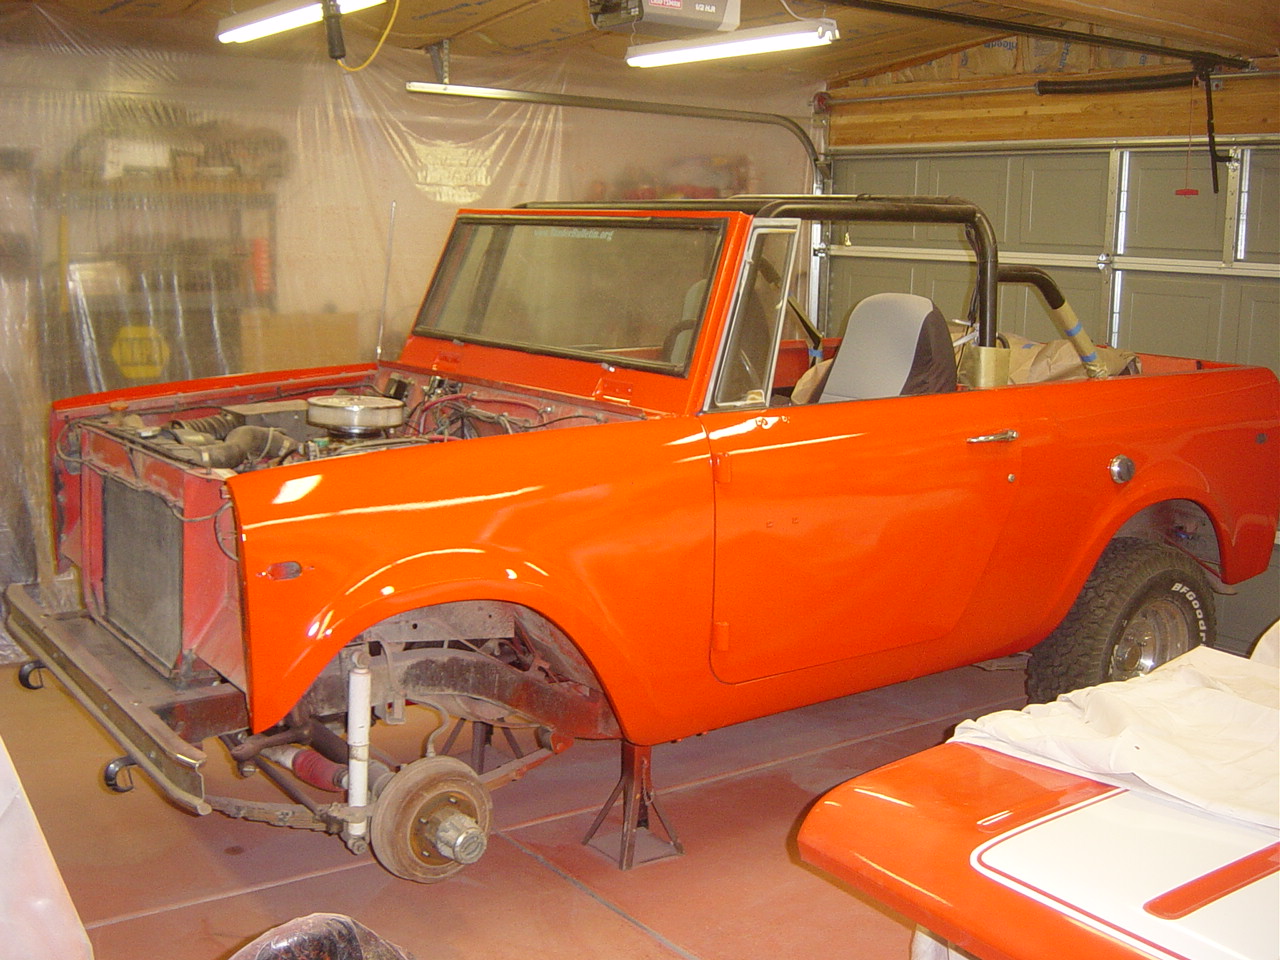
June 29, 2008
 I removed
the hood and nosepiece from the Scout
and set the hood up for painting so I
would be shooting a vertical surface.
After 3 coats of primer, I cleaned the
HVLP gun and mixed up a batch of IH
Flame Red. Somehow, I managed to loose
the spring that puts tension on the flow
control rod which rendered the HPVL gun
useless. Not wanting to waste a batch of
paint, I brought my 10 year old
Craftsman siphon paint gun out of
retirement and shot the hood and
nosepiece. Much more overspray than with
the HPLV! I now have a nice re-orange
garage floor. I removed
the hood and nosepiece from the Scout
and set the hood up for painting so I
would be shooting a vertical surface.
After 3 coats of primer, I cleaned the
HVLP gun and mixed up a batch of IH
Flame Red. Somehow, I managed to loose
the spring that puts tension on the flow
control rod which rendered the HPVL gun
useless. Not wanting to waste a batch of
paint, I brought my 10 year old
Craftsman siphon paint gun out of
retirement and shot the hood and
nosepiece. Much more overspray than with
the HPLV! I now have a nice re-orange
garage floor.
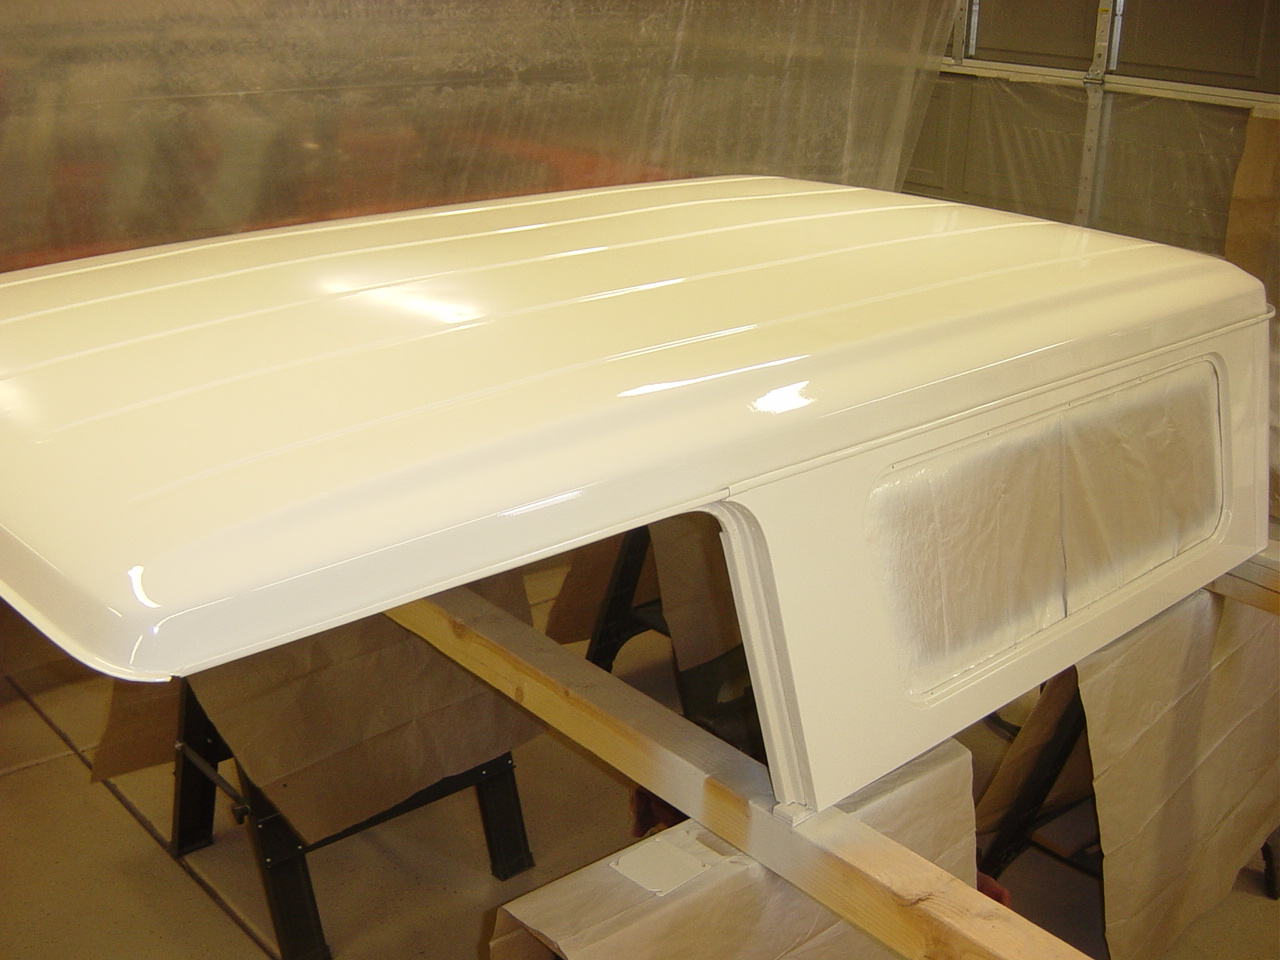
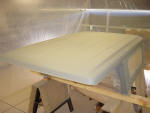
June 21, 2008
Shot the
color on the top today. It came out very
nice except for a few sags here and
there. This was just the right sized
project to help me get familiar with the
gun and polish my spraying technique a
little before I tackle the body. I'll let
it dry overnight and sand out the sags
and some of the rougher orange peel
tomorrow. It was surprising that the
color of the Alpine White was not as
white as I expected. I guess 37 years in
the sun bleached the old paint out a
little.
June 14, 2008
 Now
that the transmission is back in and
seemingly working well, I've finally
turned my attention to the repaint. I
removed the top and sanded the scratches
and filled some small dents. I applied
three coats of primer with a HVLP spray
gun from Harbor Freight and am now ready
to shoot the color coat of I.H. Alpine White. Now
that the transmission is back in and
seemingly working well, I've finally
turned my attention to the repaint. I
removed the top and sanded the scratches
and filled some small dents. I applied
three coats of primer with a HVLP spray
gun from Harbor Freight and am now ready
to shoot the color coat of I.H. Alpine White.
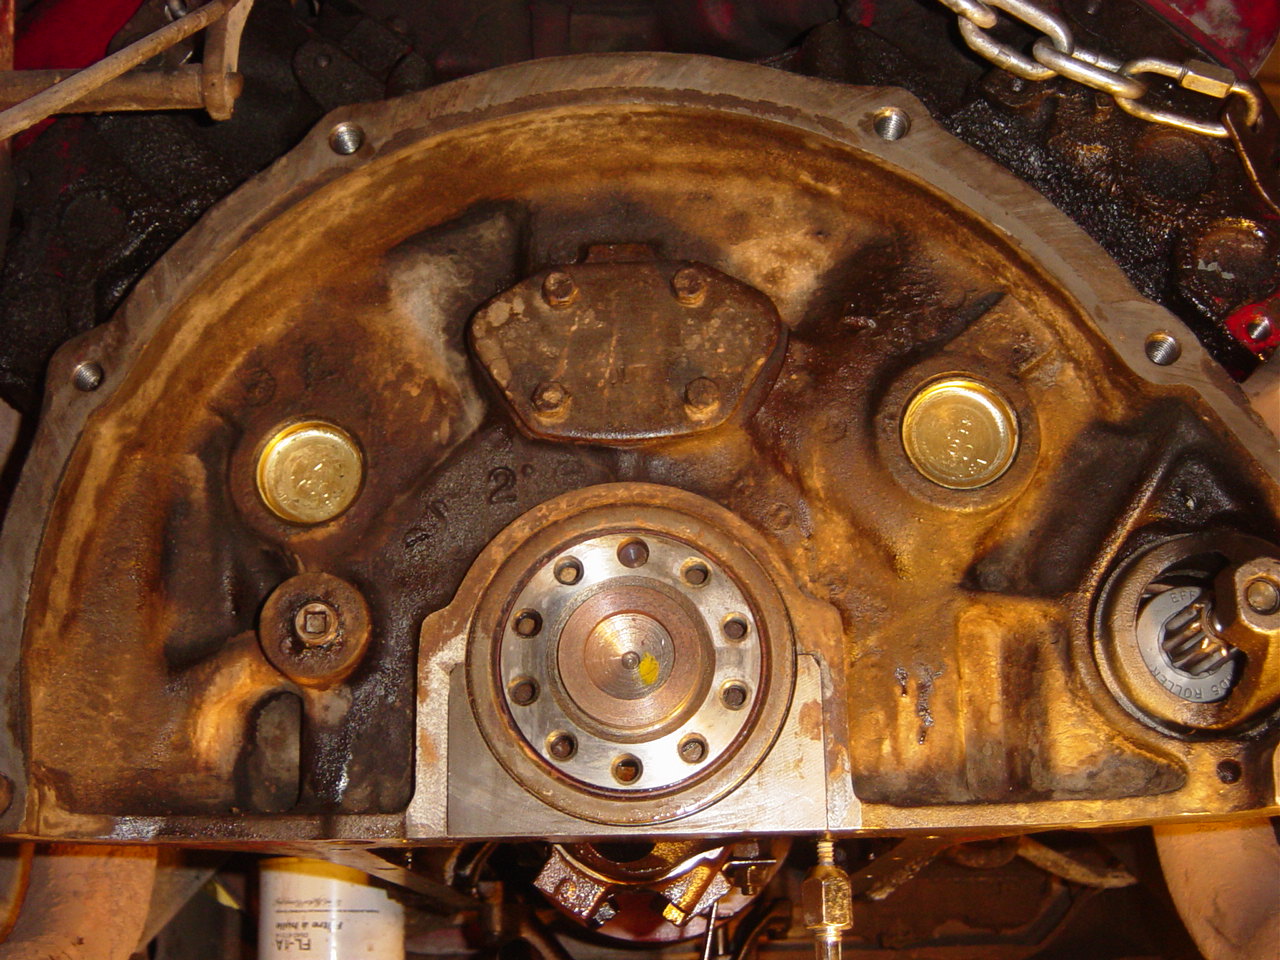
April 16, 2008
For the
last 2 weeks, I've been working on
replacing the transmission. I
acquired a Borg Warner 12 automatic
from another Scout that had swapped
in a T19. I had the transmission rebuilt
by a commercial shop using all new
parts and a rebuilt torque
converter. During the time the
transmission was out, I took the
opportunity to replace the rear
engine block freeze plugs and reseal
the oil pan and replace the rear
main bearing cap side seals.
Hopefully, this will reduce the
amount of oil that has previously
leaked from my Scout.
T19. I had the transmission rebuilt
by a commercial shop using all new
parts and a rebuilt torque
converter. During the time the
transmission was out, I took the
opportunity to replace the rear
engine block freeze plugs and reseal
the oil pan and replace the rear
main bearing cap side seals.
Hopefully, this will reduce the
amount of oil that has previously
leaked from my Scout.
Once the transmission was back from
the shop, a friend and I installed
it in a couple of hours. It took
another few hours to hook the front
drive shaft up with new U-joints and
get the transmission cross member
back in place.
I still need to hoo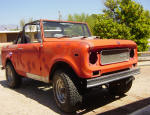 k
up the water hoses to the
transmission heat exchanger, hook up
the rear drive shaft and reinstall
the shifter. k
up the water hoses to the
transmission heat exchanger, hook up
the rear drive shaft and reinstall
the shifter.
March, 2008
Well, it's been a whole year since I've
updated the progress page. I've been
having too much fun driving and wheeling
the Scout to take any time to work on
it! I finally decided to go ahead and
repaint this year. I started by filling
dents and sanding out scratches on the
sides. Once I get the front and rear
done I can remove the top and shoot a
new coat of paint on.
March, 2007
The SR-2 has been running great for the
few times I've driven it this year. I
went on a trail run with the Sonora
Desert Scouts on Feb 24 and it performed
beautifully! So much so that I hesitate
to run it off road too much more for
fear of turning it into a beater trail
rig. Just so happens I have a candidate
for that job. A 1971 800B that I picked
up cheap to use as a parts truck turns
out to be a worthy candidate for a trail
rig. It's got a 196 I4 with a T-18 and
Dana 20 and a PTO winch! The body is
already beat up so I won't have to worry
about taking it on any type of trail. So
now, I'm splitting time between working
on my
Comanche restoration and getting
some things checked out on the trail
Scout. I'm still planning to do a paint
job on the SR-2 before attending the
RMIHR in July.
August 1, 2006
Wow! It's hard to believe it's been a
year since I posted an update. The
Scout's been running pretty good. I take
it out once a month to the Sonora Desert
Scouts meeting and drive it to work
every other week. I've been busy working
on my new garage which is almost
finished and ready to start working in.
I've also acquired a couple of parts
Scouts.
There was no
AZIHR this year
 and I didn't get to go
to the Rocky Mountain Rendezvous either. and I didn't get to go
to the Rocky Mountain Rendezvous either.
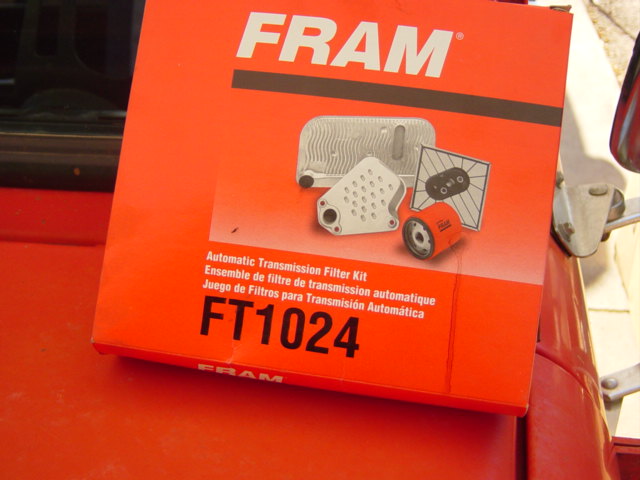
August 7, 2005
Not too
much to report since the last update. I
dropped the
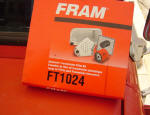 Borg
Warner transmission pan and cleaned the
filter screen. I replaced the filter and
filled the trans with new Dexron III per
the shop manual instructions. I used a
gasket in the Fram FT1024 kit from
Rock Auto. Now the trans leaks like a
seive! I've tightened the bolts down a
couple of times but it's still leaking.
I guess I'll have to drop it again and
use some Right Stuff on it. Borg
Warner transmission pan and cleaned the
filter screen. I replaced the filter and
filled the trans with new Dexron III per
the shop manual instructions. I used a
gasket in the Fram FT1024 kit from
Rock Auto. Now the trans leaks like a
seive! I've tightened the bolts down a
couple of times but it's still leaking.
I guess I'll have to drop it again and
use some Right Stuff on it.
We went to
the Rocky Mountain IH Rendezvous in
July. I had some problems with the
Holley 2300 flooding out so I couldn't
go on the Monday trail run. I replaced
the float bowl valve and it seemed to
fix the problem. We did some back road
cruising at my son's place in Orderville,
UT after the Rendezvous. During the
trip, one of the wires from the ignition
switch broke off the starter solenoid.
We did a trail fix to get it going
again. I guess some wiring repairs will
be next on my list.
May 14, 2005
I finally
got around to installing the new turn
signal harness I had purchased form
Shee-Mar, Inc. back in October.
I had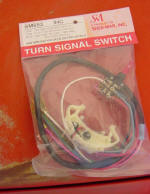 continued to have problems with my
stop lights since I messed with
replacing the switch shortly after I
got the Scout. Only on brake light
would come on unless the turn signals
were activated. I set aside most of
the day to R&R the harness. Removing
the old one went pretty fast. Once I
got the steering wheel off and removed
the screws holding in the T/S switch
and hazard switch, I noted the
location of the 6 conductor harness
connector and verified that the new
harness matched up, I was ready to
remove it. I took a while to get the
connector pried apart without breaking
anything. Since I wasn't going to
re-use the old harness, I cut the
wires off at the switches and pulled
the harness out of the column. Then, I
removed the terminals from the
connector shell. I fished the wires
from the new harness back through the
column. It was easier to fish them
with multiple fish wires attached to 2
or 3 wires rather than try to pull
them all through at once. I got the
new wire terminals plugged into the
old connector shell and re-attached
the switches. Of course despite having
made myself a diagram before I
disassembled the connector, I still
managed to switch the brown and green
wires. So when I tested the turn
signals, the left turn postion flashed
the right tail light and vise-versa.
After swapping the wires back to where
they belonged, everything worked fine.
Now I have turn signals with BOTH
lights!
continued to have problems with my
stop lights since I messed with
replacing the switch shortly after I
got the Scout. Only on brake light
would come on unless the turn signals
were activated. I set aside most of
the day to R&R the harness. Removing
the old one went pretty fast. Once I
got the steering wheel off and removed
the screws holding in the T/S switch
and hazard switch, I noted the
location of the 6 conductor harness
connector and verified that the new
harness matched up, I was ready to
remove it. I took a while to get the
connector pried apart without breaking
anything. Since I wasn't going to
re-use the old harness, I cut the
wires off at the switches and pulled
the harness out of the column. Then, I
removed the terminals from the
connector shell. I fished the wires
from the new harness back through the
column. It was easier to fish them
with multiple fish wires attached to 2
or 3 wires rather than try to pull
them all through at once. I got the
new wire terminals plugged into the
old connector shell and re-attached
the switches. Of course despite having
made myself a diagram before I
disassembled the connector, I still
managed to switch the brown and green
wires. So when I tested the turn
signals, the left turn postion flashed
the right tail light and vise-versa.
After swapping the wires back to where
they belonged, everything worked fine.
Now I have turn signals with BOTH
lights!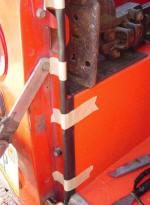
April 9-10, 2005
My annual
trip to Prescott Valley for the
Arizona IH Rendezvous.
March 12, 2005
Installed
the rear liftgate and tailgate seal I
got on Ebay today. This was original
IH weatherstrip PN 374441C1 so it fit
perfectly. I paid $50 for it which I
thought was resonable since the
comparable aftermarket molding from
Metro Molded Products (PN LP 103-G)
sells for about $2.50/ft and it takes
11 feet. I still need a piece to
go on the bottom edge of the liftgate
so I may order it from them.
February
12, 2005
After I
got the top back on, I decided I
should finally install the door
weatherstrip I got from ScoutParts.com
about a year ago. I removed the old,
dried and cracked original seals and
wire brushed the loose particles off.
Then, I used some Xylene to soften and
remove the remaining adhesive. I
installed the new seals with GM
Weatherstrip Adhesive. Because the
windows don't end up in the correct
place when rolled up and the doors
still have a bit of sag, the windows
don't seal tight against the new
gaskets. I'll have to do some playing
with the adjustments on the doors and
windows to get a better seal.
December 2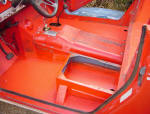 8-31, 2004
I took
advantage of a week off from work
during the Holida 8-31, 2004
I took
advantage of a week off from work
during the Holida ys
to finish up the floor project. Got
two coats of orange Durabak 18 bed
liner layed down. The color is pretty
close to the original Omaha Orange on
the Scout but I expect it to fade as
it ages. If it gets too "pinkish",
I'll have to top coat it with some
orange enamel. Anyhow, once the bed
liner cured for a couple of days, I
put the roll bar in and then put the
gas tanks in. After re-attaching the
front seats, I fired her up and took a
short trip to the gas station to top
off one of the tanks. Sure felt good
to have her back on the road!. Now
it's time to put the travel top back
on for a couple of our winter months. ys
to finish up the floor project. Got
two coats of orange Durabak 18 bed
liner layed down. The color is pretty
close to the original Omaha Orange on
the Scout but I expect it to fade as
it ages. If it gets too "pinkish",
I'll have to top coat it with some
orange enamel. Anyhow, once the bed
liner cured for a couple of days, I
put the roll bar in and then put the
gas tanks in. After re-attaching the
front seats, I fired her up and took a
short trip to the gas station to top
off one of the tanks. Sure felt good
to have her back on the road!. Now
it's time to put the travel top back
on for a couple of our winter months.
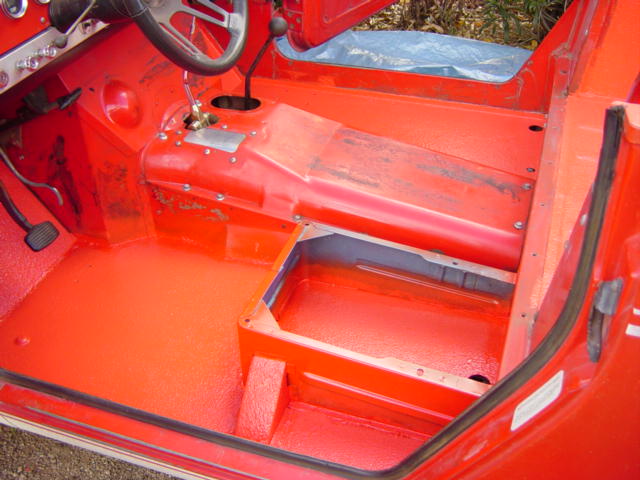
December 19, 2004
Finally
got an entire weekend to work on the
Scout so I took advantage of the
sunshine and low 70's weather to
complete the floor pan installation. A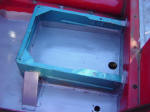 fter
some more minor grinding and
adjustments, the pan fit into place. I
placed 3/16" pop rivets in several
locations to hold it in place and then
put spot MIG welds around the
perimeter. I put a few underneath also
wherever I could reach and there
wasn't an exhaust pipe or frame rail
in the way. After a while, some of the
welds actually looked pretty good!
Then I ran bead of seam sealer
around the edges of all the seams to
keep out water. I welded in the
seat base I had gotten a couple months
ago which was the start of this whole
project. After Christmas, I'll lay
down a double coat of bed liner and
then I can start putting things back
together. fter
some more minor grinding and
adjustments, the pan fit into place. I
placed 3/16" pop rivets in several
locations to hold it in place and then
put spot MIG welds around the
perimeter. I put a few underneath also
wherever I could reach and there
wasn't an exhaust pipe or frame rail
in the way. After a while, some of the
welds actually looked pretty good!
Then I ran bead of seam sealer
around the edges of all the seams to
keep out water. I welded in the
seat base I had gotten a couple months
ago which was the start of this whole
project. After Christmas, I'll lay
down a double coat of bed liner and
then I can start putting things back
together.
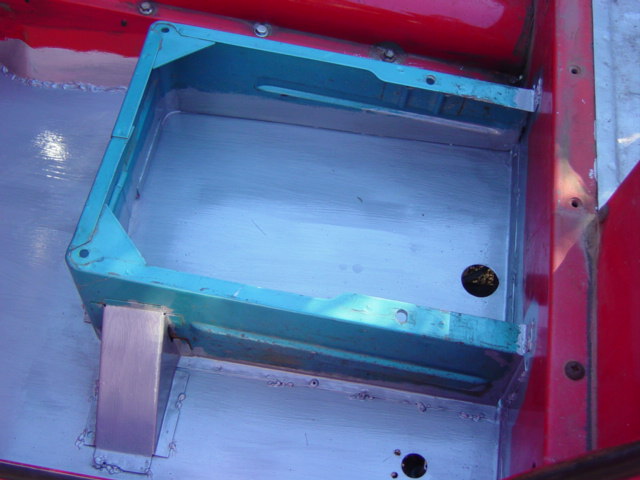
December 12, 2004
The new
floor panel arrived so I set about
doing the prep work to get it ready to
go in the Scout. Although it was cut
to the correct shape, I had to do
12, 2004
The new
floor panel arrived so I set about
doing the prep work to get it ready to
go in the Scout. Although it was cut
to the correct shape, I had to do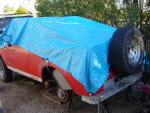 some minor grinding to get it to fit
properly. Then I cut out the holes for
the drain plug, gas tank selector
valve, body mount bolt and gas pedal
studs. Next, I welded the braces to
the underside of the panel. I also
repaired the gas line I cut when
removing the old floor. Everything is
pretty much ready to go back in now.
If the weather is nice next weekend, I
should be able to get this part
finished. The Scout looks pretty sad
sitting there with no top, seats or
roll bar and the rear wheels off.
some minor grinding to get it to fit
properly. Then I cut out the holes for
the drain plug, gas tank selector
valve, body mount bolt and gas pedal
studs. Next, I welded the braces to
the underside of the panel. I also
repaired the gas line I cut when
removing the old floor. Everything is
pretty much ready to go back in now.
If the weather is nice next weekend, I
should be able to get this part
finished. The Scout looks pretty sad
sitting there with no top, seats or
roll bar and the rear wheels off.
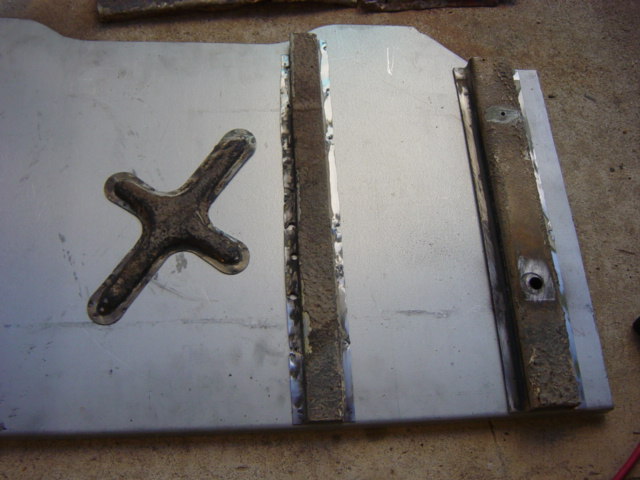
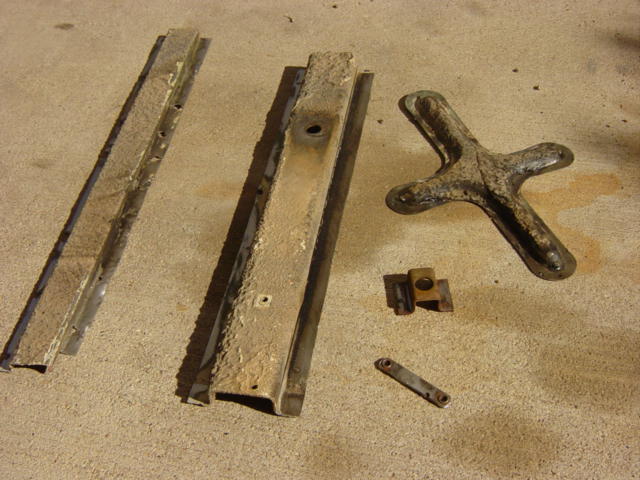
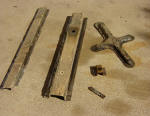 November 25, 2004
While the
Thanksgiving turkey was cooking, I
took the opportunity of being home
from work to clean up the areas where
the new floor will be attached.
I also removed, straightened and
cleaned up the braces and spacer from
the old floor pan. These will need to
be reattached to the new panel before
it gets welded in place. The floor
panel I ordered from
ScoutParts.com hasn't come yet.
Apparently, there was a problem with
steel supply at the manufacturer.
That's just as well as it gives me
time to prepare all the little things
that need to be done before the floor
goes in. Hopefully, I'll be able to
get the floor back in next weekend.
After that, I can resume my original
project: coating the bed and floors
with bed liner. November 25, 2004
While the
Thanksgiving turkey was cooking, I
took the opportunity of being home
from work to clean up the areas where
the new floor will be attached.
I also removed, straightened and
cleaned up the braces and spacer from
the old floor pan. These will need to
be reattached to the new panel before
it gets welded in place. The floor
panel I ordered from
ScoutParts.com hasn't come yet.
Apparently, there was a problem with
steel supply at the manufacturer.
That's just as well as it gives me
time to prepare all the little things
that need to be done before the floor
goes in. Hopefully, I'll be able to
get the floor back in next weekend.
After that, I can resume my original
project: coating the bed and floors
with bed liner.
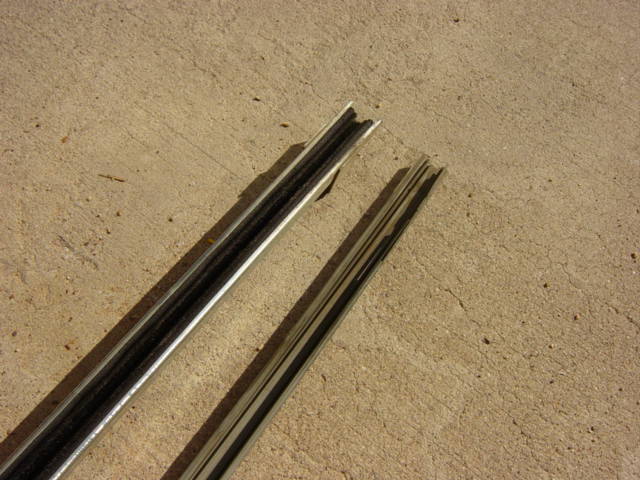
November 20, 2004
I've
spent the last two weekends
 cutting
out the old floor panel. It involved a
lot of drilling out spot welds and
using an air chisel to finish
separating the sheet metal from the
rest of the Scout. I ended up cutting
out sections of floor to make it
easier to access some of the spot
welds. I salvaged the channel braces
from the underside of the floor and
will need to practice my MIG welding a
little to get those attached to the
new floor.. cutting
out the old floor panel. It involved a
lot of drilling out spot welds and
using an air chisel to finish
separating the sheet metal from the
rest of the Scout. I ended up cutting
out sections of floor to make it
easier to access some of the spot
welds. I salvaged the channel braces
from the underside of the floor and
will need to practice my MIG welding a
little to get those attached to the
new floor..
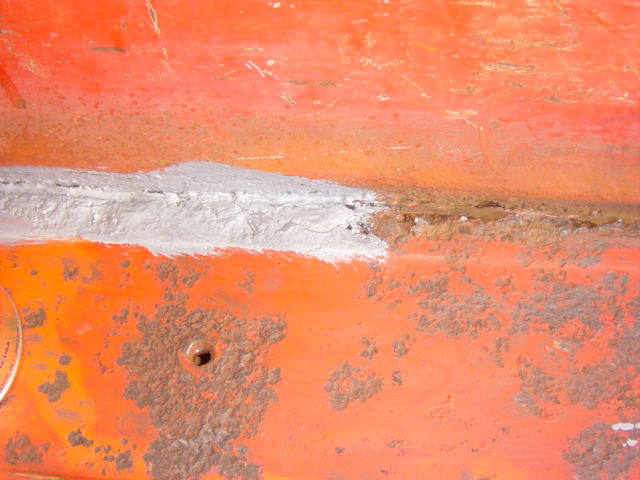
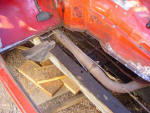
November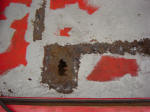 6, 2004
As is
typical when working on Scouts, I got
an unpleasant surprise from the rust
monster. I removed the front driver's
seat base thinking that the underlying
floor sheet metal was fairly solid.
Once the seat base was removed, the
rust situation was worse than
originally thought. There are several
rust-through areas that were hidden by
the seat base flanges that were spot
welded to the floor. In order to
insure a solid support for the new
seat base, it's going to be necessary
to replace the entire driver's side
floor. So now I will have to remove
the roll bar, one body mount bolt and
the gas pedal ball studs, then drill
out the spot welds and air chisel the
floor panel out. Fortunately,
replacement floor sheet metal is
available for the 800. I might also
take this opportunity to install some
mounts for the roll bar that are
attached to the frame.
6, 2004
As is
typical when working on Scouts, I got
an unpleasant surprise from the rust
monster. I removed the front driver's
seat base thinking that the underlying
floor sheet metal was fairly solid.
Once the seat base was removed, the
rust situation was worse than
originally thought. There are several
rust-through areas that were hidden by
the seat base flanges that were spot
welded to the floor. In order to
insure a solid support for the new
seat base, it's going to be necessary
to replace the entire driver's side
floor. So now I will have to remove
the roll bar, one body mount bolt and
the gas pedal ball studs, then drill
out the spot welds and air chisel the
floor panel out. Fortunately,
replacement floor sheet metal is
available for the 800. I might also
take this opportunity to install some
mounts for the roll bar that are
attached to the frame.
October 24,
2004
I thought
it was going to be a simple job to
remove the seats, old floor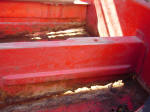 mat and apply rust encapsulator to the
front floor. After pulling up the mat
and scraping off the rubber sound
deadening/insulation, I discovered
that the driver's seat base was pretty
badly rusted away. The floor panels
themselves have some pitting but are
basically solid. Before I finish
applying the Rust Bullet and then the
DuraBak, I've got to remove the old
seat base and weld in a new one. I
also discovered some weak metal in the
floors under the front mount plates
for the roll bar. This will have to be
dealt with eventually. I will probably
make some 3/16 brackets to bolt on
underneath and weld on to the frame.
mat and apply rust encapsulator to the
front floor. After pulling up the mat
and scraping off the rubber sound
deadening/insulation, I discovered
that the driver's seat base was pretty
badly rusted away. The floor panels
themselves have some pitting but are
basically solid. Before I finish
applying the Rust Bullet and then the
DuraBak, I've got to remove the old
seat base and weld in a new one. I
also discovered some weak metal in the
floors under the front mount plates
for the roll bar. This will have to be
dealt with eventually. I will probably
make some 3/16 brackets to bolt on
underneath and weld on to the frame.
October 17,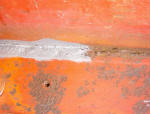 2004
While the
travel top was still off the truck, I
took the opportunity to do some work
on the rear bed. I had pulled up the
rubber mat a couple of months ago and
scraped off the rubber membrane
underneath. There were some pretty
severe rust spots, especially
along the edges where the bed meets
the side panels. There was lots of
pitting and a couple of pin holes all
the way through. I wire brushed all
the loose rust scales off, filled the
pin holes with body filler, cleaned
with some High Efficiency Reducer
(which is mostly xylene) and applied
two coats of
Rust Bullet rust
prevention/control product. It's a
thinner consistency than Eastwood's
Rust Preventer put as it cures, it
becomes thicker. Before the top goes
back on for the winter, I'll coat the
floor with some
DuraBak textured bed liner to
further water proof it and cover the
rust pits. It comes in colors so I'll
do it with orange to match the rest of
the Scout.
2004
While the
travel top was still off the truck, I
took the opportunity to do some work
on the rear bed. I had pulled up the
rubber mat a couple of months ago and
scraped off the rubber membrane
underneath. There were some pretty
severe rust spots, especially
along the edges where the bed meets
the side panels. There was lots of
pitting and a couple of pin holes all
the way through. I wire brushed all
the loose rust scales off, filled the
pin holes with body filler, cleaned
with some High Efficiency Reducer
(which is mostly xylene) and applied
two coats of
Rust Bullet rust
prevention/control product. It's a
thinner consistency than Eastwood's
Rust Preventer put as it cures, it
becomes thicker. Before the top goes
back on for the winter, I'll coat the
floor with some
DuraBak textured bed liner to
further water proof it and cover the
rust pits. It comes in colors so I'll
do it with orange to match the rest of
the Scout.
August 22, 2004
Decided
to put in the passenger side window
regulator I got to replace my old one
which binds up pretty bad. I thought
it was because the arms might be bent
but for sure the two missing mounting
screw posts didn't help. While I was
at it I installed new window "felts"
(anti-rattle strips) from Anything
Scout. The strips are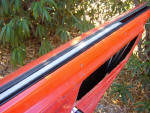 not exact
replacements for the Scout 80/800.
They are rubber "wipers" on
both sides and have no chrome bead
like the originals. No big deal but
the bigger issue was that the holes
for the mounting clips are not in the
same locations as the original. This
was not going to be not exact
replacements for the Scout 80/800.
They are rubber "wipers" on
both sides and have no chrome bead
like the originals. No big deal but
the bigger issue was that the holes
for the mounting clips are not in the
same locations as the original. This
was not going to be a quick, snap
out-snap in replacement. I decided to
mark the new locations and drill holes
for some #8 self tapping sheet metal
screws. On the inside, I used some
window belt weatherstrip from
Restoration Specialties (P/N M113)
which is a close replacement for the
original. Those pieces are attached
with wire staples and require some
drilling and tedious replacement of
the new staples to get them installed.
A quicker way would be to use 1/8" pop
rivets which would be buried deep
enough in the fuzzy pile and not
scrape against the window. The
rear edge window guides were replaced
with felt window channel from
Restoration Specialties (P/N 10-E-60). I got
everything in but the window still doesn't
work perfectly. I still have
to pull it by hand to get it to roll
all the way up. And going down, it
seems to hit something that keeps it
from lowering smoothly. I have to let
it fall hard against the resistance to
make it go down past whatever the
restriction is. Oh well. At least I
got the felts put in so the window
doesn't rattle anymore. It makes a big
difference when driving on rough
roads, even around town. a quick, snap
out-snap in replacement. I decided to
mark the new locations and drill holes
for some #8 self tapping sheet metal
screws. On the inside, I used some
window belt weatherstrip from
Restoration Specialties (P/N M113)
which is a close replacement for the
original. Those pieces are attached
with wire staples and require some
drilling and tedious replacement of
the new staples to get them installed.
A quicker way would be to use 1/8" pop
rivets which would be buried deep
enough in the fuzzy pile and not
scrape against the window. The
rear edge window guides were replaced
with felt window channel from
Restoration Specialties (P/N 10-E-60). I got
everything in but the window still doesn't
work perfectly. I still have
to pull it by hand to get it to roll
all the way up. And going down, it
seems to hit something that keeps it
from lowering smoothly. I have to let
it fall hard against the resistance to
make it go down past whatever the
restriction is. Oh well. At least I
got the felts put in so the window
doesn't rattle anymore. It makes a big
difference when driving on rough
roads, even around town.
 August
7, 2004
I
got the new seat covers back from the
upholstery shop and spent a few hours
getting them put on. The old foam
padding was still useable although I
did have to add some foam to a few
places that had been eroded away. Now
I need to get some rear seat belts put
in. August
7, 2004
I
got the new seat covers back from the
upholstery shop and spent a few hours
getting them put on. The old foam
padding was still useable although I
did have to add some foam to a few
places that had been eroded away. Now
I need to get some rear seat belts put
in.
July 24, 2004 I used the old,
rotted wood from the rear seat as
patterns to make a new seat back and
bottom. After cutting out the wood, I
coated the pieces with spar varnish
and clear urethane to help protect it
from moisture. I cleaned and sanded
the seat frame and painted it with
satin black. Then I took the remains
of the original vinyl seat cover to an
upholstery shop to be
reproduced.
July 10, 2004 I had
determined that the original AM pushbutton
radio in the Scout was still good so I
ordered an OEM replacement 4x8 speaker to
replace the original which was completely
shot. Before I put the radio back in the
dash, I decided to run new defroster vent
hoses. I used Fresh Air-Defroster Duct Hose
from JC Whitney. In order to keep the hoses
securely in place I used 3M Super
Weatherstrip Adhesive. Getting access to the
dash area required the removal of my ABS
plastic glove box. There's not much room for
the defroster hoses to run behind the glove
box so I had to crush them a little to
provide space for the glove box. I checked
for air flow after attaching the hoses and
after reinstalling the glove box. I buttoned
everything back up and set one of the radio
presets to 1450 AM, our local oldies
station.
July 4, 2004
I decided to put
in my rear Prothane spring bushings. They
went a little easier than the front although
I had to cut out the upper rear bushings
that are in the frame brackets.
June 26, 2004 Today, I pulled
the passenger side gas tank, cleaned out 30
years worth of accumulated dirt in the body
cavity and installed the new filler hose I
got from SuperScout Specialists at AZIHR. I
also bought a Rancho 5000 shock to use as a
steering stabilizer. It makes the truck
harder to turn when you're not moving. I
think it might be too much for my manual
steering so I may take it off or go with a
regular el-cheapo shock that's not as stiff.
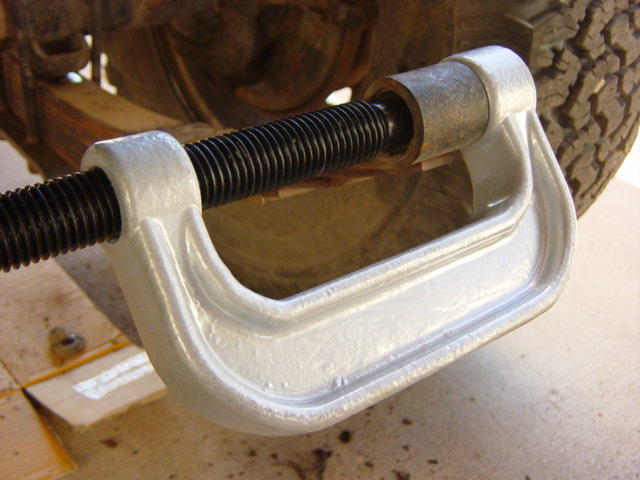
June 5-6, 2004 On the
Gardner Canyon
trail run on May 23, I noticed the tie
rod was bent and the ball ends were badly
worn so this weekend I replaced the tie rod
and rebuilt the drag link ends. I had a new
tie rod and drag link repair kit from
SuperScout Specialists. When starting the
tie rod removal, it didn't appear that there
was enough ro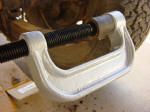 om
to get the ball end shaft out of the spindle
without removing the front spring shackle.
Then, there still wasn't enough clearance to
drop the rod so I removed the rear shackle.
There still didn't look like there was
enough room to get the shaft out so I
loosened the u-bolt nuts so I could move the
spring around enough to get the tie rod end
off. After having almost removed the spri om
to get the ball end shaft out of the spindle
without removing the front spring shackle.
Then, there still wasn't enough clearance to
drop the rod so I removed the rear shackle.
There still didn't look like there was
enough room to get the shaft out so I
loosened the u-bolt nuts so I could move the
spring around enough to get the tie rod end
off. After having almost removed the spri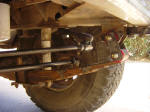 ng,
I decided to go ahead and put in the new
Prothane poly spring bushings I had gotten
several months ago. I used Harbor Freights
3 in1 Service Tool Kit which works well
on spring bushings. Using its large C clamp,
I managed to push out 4 of the 6 spring
bushing intact. The other two I had to push
out the center sleeve and then saw out the
outer sleeve. After the old ones were out, I
put in the new poly bushings and reattached
the spring shackles with new grade 8 bolts.
The new tie rod went on easily and the
rebuilt drag link likewise. I used the
push-pin-in-the-center-of-the-tire method to
check and adjust toe-in to zero. After
everything was torqued to spec and lubed, I
took a turn around the block and was happy
to experience tighter, truer steering. ng,
I decided to go ahead and put in the new
Prothane poly spring bushings I had gotten
several months ago. I used Harbor Freights
3 in1 Service Tool Kit which works well
on spring bushings. Using its large C clamp,
I managed to push out 4 of the 6 spring
bushing intact. The other two I had to push
out the center sleeve and then saw out the
outer sleeve. After the old ones were out, I
put in the new poly bushings and reattached
the spring shackles with new grade 8 bolts.
The new tie rod went on easily and the
rebuilt drag link likewise. I used the
push-pin-in-the-center-of-the-tire method to
check and adjust toe-in to zero. After
everything was torqued to spec and lubed, I
took a turn around the block and was happy
to experience tighter, truer steering.
May
8-9,
2004 With temperatures in the
mid to upper nineties already, I decided it
was time to get the travel top off and
stored away for the summer. In preparation
for this, I needed to do some work on my
spare tire carrier so I could get the tire
out of the back of the Scout. I removed the
rack and bent the legs so that they were a
little more parallel to the tailgate. This
allowed the 31x10.50 All Terrain tire to fit
over the studs on the rack far enough so I
could get lug nuts on them. It's a little
off-center but hardly noticeable.
I
also removed the rear seat. It's going to
need new wood backing and vinyl covering and
I might as well get
 stared on that project
too. The other thing I wanted to do was get
the passenger side window to operate
smoother. I removed the upholstered door
panel and applied some white grease to the
window regulator arms. Works a little
better, but you still need to pull it up by
hand while cranking. Guess I need to find a
new regulator. stared on that project
too. The other thing I wanted to do was get
the passenger side window to operate
smoother. I removed the upholstered door
panel and applied some white grease to the
window regulator arms. Works a little
better, but you still need to pull it up by
hand while cranking. Guess I need to find a
new regulator.
The
travel top was quite easy to get off. After
removing, labeling and saving all the
attachment bolts, my brother and I lifted
off the top and set it on some 8"
cinder blocks in the back yard. I might do
some touch-up work on a couple of dents and
replace the door window upper seals while
it's off.
The
Scout is like a whole 'nother vehicle with
the top off! Lots cooler and less noisy
without that metal acoustic chamber
amplifying the road rattles and engine
noise. I attached the bikini top that I got
with the Scout from the PO. It's a little
short in the back but it keeps the sun off
my head and that's the main thing. Now, I'm
anxious to take it out and do some topless
cruising in the desert.
Things
I need to consider are securing the Hi-Lift
jack, as well as a camp shovel, come-a-long
and various bungees I had stored under the
rear seat. I may need to mount some kind of
trail box securely to the floor that I can
lock stuff up in.
April
24-25,
2004 Attended the 5th AZ IH
Rendezvous in Prescott Valley, AZ. See the Trail
Reports page for details.
March
7,
2004 I successfully bid for a
stock spare tire carrier on Ebay. I cleaned
it up painted it satin black which I think
is the original color. I mounted it to my
tailgate and step bumper (that already had
two of the mounting holes drilled in it).
However, when I went to put my 31x10.50
spare on it, there was not enough of the
mounting surface extending out from the
carrier to allow the wheel to contact it.
The tire hits the tailgate and there's still
a couple of inches left between the surface
of the mount and the wheel. I'll have to
figure out a way to either modify the mount
for a deeper/larger tire or just continue to
store my spare inside the Scout. Update: After
looking closely at some other tire carriers,
I seems mine is bent enough to prevent the
tire from mounting properly. I'll need to
remove it and bend it out straight again.
Feb 22,
2004 I've only had time to do
some odds and ends on the Scout for the last
couple of weeks. I put in the replacement
glove box I got from ScoutParts.com.
Fits perfect. I ordered some flexible air
duct hose from JC
Whitney Co to replace the defroster hose
and the fresh air intakes. I received the 4
1/2" hose for the engine compartment
and put it on. When I receive the 2"
hose for the defroster ducts, I'll need to
pull out the glove box to get it installed
though.
I
also put on the Back
Country Binders fuel filler flanges and
new caps I had. This should keep the gas in
the tanks when I go on the Sonora
Desert Scouts trail run in March. I
finished up by re-attaching the speedometer
cable I had disconnected a couple weeks ago
when I had the gauge panel off.
I
successfully bid on a spare tire carrier on Ebay.
I should be getting it in a week or so.
Feb 7,
2004 I finished up installing
the heater in the Scout. I lucked out and
found a wire from the ignition switch
that had been cut off behind the dash. It
was right next to the heater fan switch so
it may have been used for that purpose
originally. I put a 14amp fuse on the line
and hooked it to the fan switch. After
reattaching the heater hoses and letting the
engine warm up a little, I tried everything
out and it works fine.
Feb
1,
2004 Only had a little time
to work on the Scout today before the Stupor
Bowl started. I decided to put in the new
driver's side wiper motor I got from Chris
in Colorado. I'll be driving the Scout to
work this week and we're expecting the
biggest winter storm of the season to hit on
Tuesday. I wanted to make sure I can see
where I'm going! I'm getting pretty good at
R&Ring wiper motors now. The hardest
part is getting the pin out of the knurled
hub on the end of the wiper shaft. The rest
is just a matter of getting the vacuum hoses
on and off.
After
that, I put on the new driver's side fuel
filler neck I got from Scout
M.A.D.ness in Lubbock, TX. I finished
cleaning the sand and rocks out of the
fender cavity next to the tank and put the
rock guard/cover back on. I put a gallon of
gas in the tank and switched the selector
lever to the driver's side. I ran it long
enough to tell me it was using gas from the
driver's side tank so I filled it the rest
of the way.
Thinking
about the cold, wet weather we're supposed
to get made me think of the heater that I
had removed a month or so ago when I pulled
out all the A/C stuff. I got some non-A/C
ducts from Howie in N.Carolina. I cleaned up
the parts and sprayed on a coat of satin
black to match my dash. I checked out the
heater core and put on the motor I got from
Chris in Colorado to replace the bent
squirrel cage on my original. I got the
heater blower/core bolted back in the engine
compartment but I'll need to tap a hot wire
from the ignition switch for the heater
blower switch and hook up the heat/vent cable
before I can use it.
Jan 24,
2004 On my way home from a
Scout club meeting last week, I was
informed that my tail lights weren't
working. After half a day of tracing
wires and checking connections, removing
the tail light buckets, etc, I
figured out that the turn signal
canceling cam I messed with on Jan 10
was the cause. Apparently, the switch is
still not making contact properly with
the turn signal harness. The lights work
fine when the left turn signal is on but
not when the turn signals are off. Looks
like I'll have to pull the steering
wheel again and make some more
adjustments. It's a cold, drizzly
weekend here in Tucson (our week of
winter) so I went inside to watch the
UofA Basketball game. 
Jan 18,
2004 I focused on getting the
steering wheel back on so the Scout
would be driveable again. I guess I'll
have to wait to do a steering wheel
upgrade with a full install kit to get
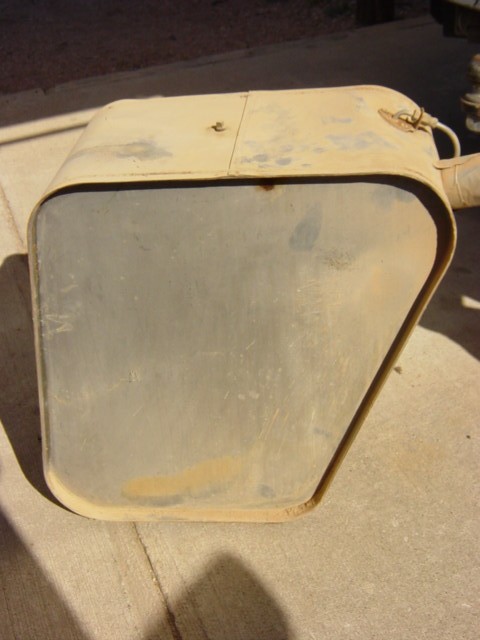
the canceller to work. I decided to pull
the driver's side fuel tank to check it
for condition and rust. I have a new
filler neck on the way and wanted to
make sure the tank was OK before
installing it. I was very surprised at the condition of the tank. It almost
looked new! Just a couple of surface
rust spots on the outside. The inside
was clean with no sediment or rust. A
P.O. had even taken the time to cover the
fill tube opening with duct tape to keep the
tank from collecting dirt and water. I
dabbed some Eastwood Rust Encapsulator
on the rust spots, drilled out a
broken off tank mounting bolt and
reinstalled the tank. As is typical, the cavity next to
the tank was full of dirt. It's a good
thing we don't get much rain in Arizona,
because that could have really caused
some rust through if it had been allowed
to get wet very often. I cleaned
it out and will install my new filler
neck next week.
Jan 10,
2004 I decided to pull the
steering wheel and replace the turn signal
canceling cam. As usual, a 2 hour job turned
into a weekend project. I got the wheel off
without trouble. The new canceling cam wires
needed to be soldered to the old wires and
following Murphy's Law, I hooked them up
backwards. After fiddling with the contacts
on the cam for an hour or so, I finally
realized the wires may be crossed. After I
swapped them, the turn signals worked again
but there is nothing on the steering shaft
or wheel hub to operate the canceling cam to make the
signals shut off. So after a day's worth of
work, I ended up no further ahead than I was
before. Maybe I'll have better luck next
weekend.
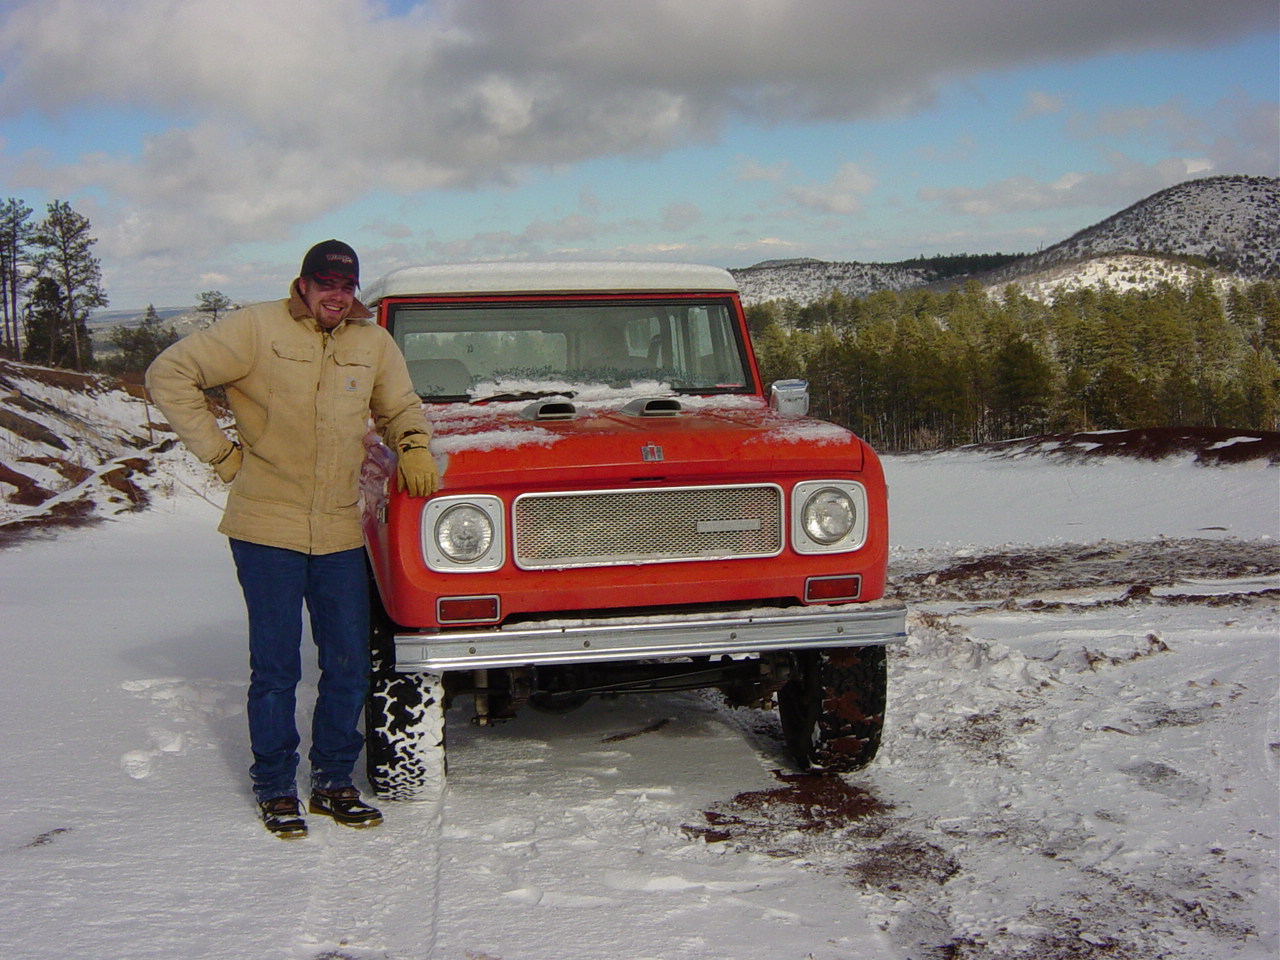
Jan 3-4,
2004 After some fun
4-wheeling in the snow up in the White
Mountains over Christmas (that's my son in
the photo, not me!), it was time to get
back to wo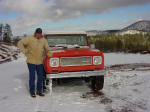 rk on the Scout. I decided to try
to fix the vacuum wipers but couldn't get to
the motors from under the dash. I removed
all the dash bolts and screws but then
realized the dash would only move about 2"
because the roll bar is in the way. Well, I
wasn't going to tear the whole scout apart,
so I removed the hubs on the shafts and then
the nut holding the shaft to the cowl. Lo
and behold, the motor fell out from the
inside. Turns out they are only held in
place by the shaft nut. I lubed up the
drivers side motor and checked it with a
vacuum source and it works ok. The passenger
side motor had a frozen shaft and I broke it
off trying to loosen it up. I'll have to
find another motor on Ebay or the
Binder
Bulletin. I cleaned up the switches and ran
all new vacuum hoses. Buttoned up the dash
but I'll be back in there to do some wiring
work later. rk on the Scout. I decided to try
to fix the vacuum wipers but couldn't get to
the motors from under the dash. I removed
all the dash bolts and screws but then
realized the dash would only move about 2"
because the roll bar is in the way. Well, I
wasn't going to tear the whole scout apart,
so I removed the hubs on the shafts and then
the nut holding the shaft to the cowl. Lo
and behold, the motor fell out from the
inside. Turns out they are only held in
place by the shaft nut. I lubed up the
drivers side motor and checked it with a
vacuum source and it works ok. The passenger
side motor had a frozen shaft and I broke it
off trying to loosen it up. I'll have to
find another motor on Ebay or the
Binder
Bulletin. I cleaned up the switches and ran
all new vacuum hoses. Buttoned up the dash
but I'll be back in there to do some wiring
work later.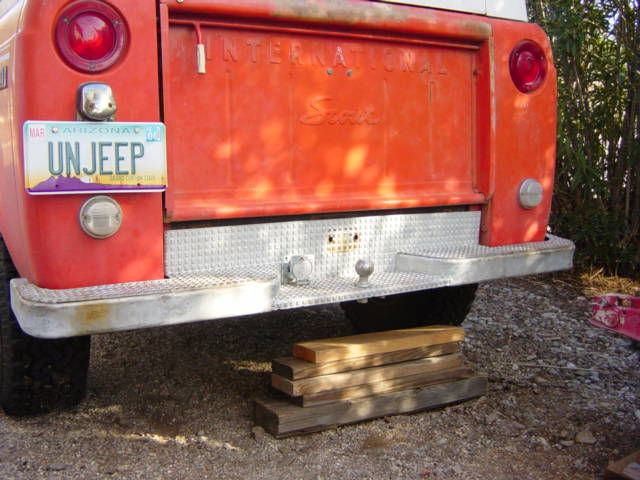
Sunday, I put on
a step bumper I got from a guy in Colorado.
It's nice and beefy and looks better than
the stock chrome SR-2 bumper. The hardest
part was getting the bolts from the original
bumper off and bolting on the new brackets.
They are inside the frame rail and access is
pretty limited. Check out my new
personalized license plate. Cool, huh?
Dec
20-21, 2003 I finally had an
entire weekend to work on the Scout. I
finished up the installation of the shifter
and replaced the transmission tunnel. While
I was cleaning the front floor pan area, I
discovered some rust on the floors next to
the rocker panels. Nothing that has rusted
through yet though. I scraped off the loose
flakes and coated the areas with Eastwood's
Rust Encapsulator. Once I pull up all the
floor mats in the rear, I'm sure I'll find
other similar spots. My intention is to
eventually coat the entire inside floor area
with POR-15 or
RustBullet, but that's a whole 'nother
project!
I
replaced the 6ga positive battery cable with
some new 1ga cable from Summit Racing. I
took this opportunity to remove some unfused
wiring the PO had running from the
positive battery cable to somewhere under
the dash. Everything still worked after that
so it must not have been anything important.
I drained and refilled the transmission with
fresh Dexron ATF. The old fluid was a
greyish color so it was definitely in need
of a change. I wasn't able to locate a
transmission pan gasket so I didn't get to
clean the filter. That will be on my list
has soon as I can get a gasket.
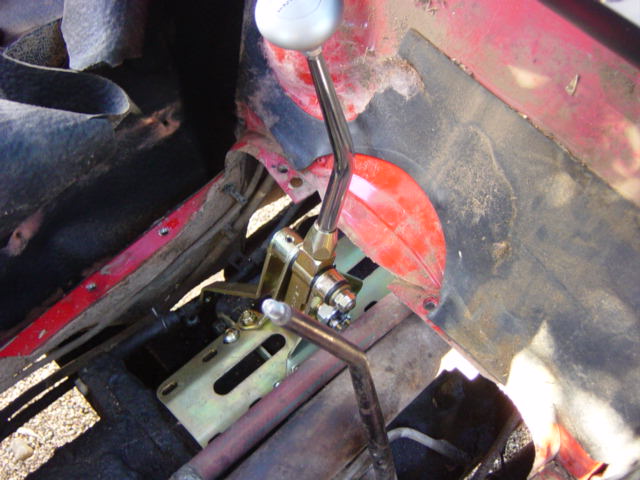
Dec
14, 2003 I set aside the
whole day to install the replacement shifter
on the Borg Warner T-39 automatic transmission.
As usually happens with these kinds of
projects, a lot of unexpected things pop up
that take more time than originally
anticipated. I spent almost two hours
getting the floor mat up and
 removing the
transmission tunnel bolts. I removed the
passenger seat and folded the mat over onto
the driver's side. I got all but two cover bolts out
and then twisted the head off of one (it had
a bolt underneath removing the
transmission tunnel bolts. I removed the
passenger seat and folded the mat over onto
the driver's side. I got all but two cover bolts out
and then twisted the head off of one (it had
a bolt underneath that held a clamp on the
shift cable) and another was rusted in place
and required the P B'laster treatment. Once
the cover was off I was finally able to see
exactly what I was dealing with. The
transmission heat exchanger is fully visible
and all the hose and trans fluid lines are
accessible. The bracket that holds the
exchanger to the transfer case is severely
overbuilt. It is also in the way of mounting
the shifter plate brackets to the
transmission. I decided to remove that
bracket since there is adequate support from
the hoses and lines attached to the
exchanger. Besides, I'm planning to replace
it entirely with a flat plate exchanger in
the future.The instructions for installing
the shifter don't take into account that
there is a Dana 20 transfer case attached to
the rear of the transmission so I had to
make some allowances for that too. After
finally getting the shifter mounted and the
cable hooked up, it was late in the day and
I still need to cut a new hole in the cover
for the shifter handle. I also need to
secure the shift cable farther away from the
exhaust pipe and do something with the lock
out switch. At least I now have a sturdy,
firm shifter with a nice long handle. that held a clamp on the
shift cable) and another was rusted in place
and required the P B'laster treatment. Once
the cover was off I was finally able to see
exactly what I was dealing with. The
transmission heat exchanger is fully visible
and all the hose and trans fluid lines are
accessible. The bracket that holds the
exchanger to the transfer case is severely
overbuilt. It is also in the way of mounting
the shifter plate brackets to the
transmission. I decided to remove that
bracket since there is adequate support from
the hoses and lines attached to the
exchanger. Besides, I'm planning to replace
it entirely with a flat plate exchanger in
the future.The instructions for installing
the shifter don't take into account that
there is a Dana 20 transfer case attached to
the rear of the transmission so I had to
make some allowances for that too. After
finally getting the shifter mounted and the
cable hooked up, it was late in the day and
I still need to cut a new hole in the cover
for the shifter handle. I also need to
secure the shift cable farther away from the
exhaust pipe and do something with the lock
out switch. At least I now have a sturdy,
firm shifter with a nice long handle.
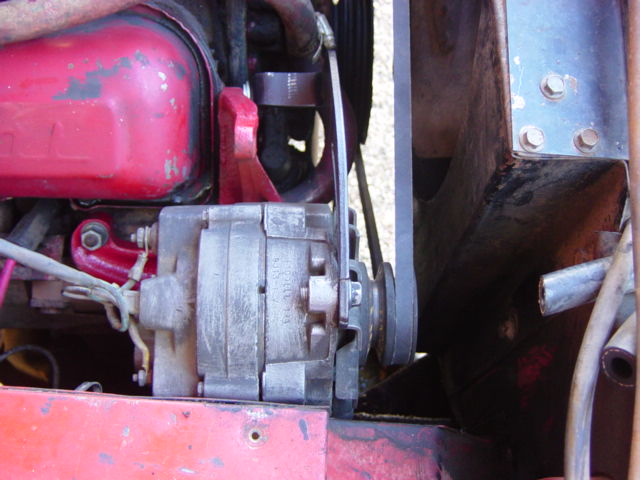
Dec 7, 2003 I had intended to work on replacing the broken off shifter
handle on the Borg Warner automatic transmission today. I
had also received an alternator mounting bracket from an online purchase and wanted to get rid of the old combination A/C compressor/alt bracket. What I thought was going to be a simple job turned into a
major effort. In order to remove the bolts from the old bracket, I had to remove the fan and water pump pulleys. Once that was done, I tried to test fit the new bracket. It bolted up fine to the head and a stud on the exhaust manifold. The only problem was that there was not enough room between the bracket and the inside fender well to get the alternator
in! I had to grind down some webbing on the bracket and part of the alternator case to get enough clearance to
even mount the alternator. This only gave me about 1/4 inch of adjustment though. After some precision work with a 5 lb sledge on the fender well sheet metal, I got about 1/2 in. of adjustment
room. Then, after several trips to the auto parts store to get
exactly the right length belt, I got the alternator mounted and the belt tightened and the fan put back in. By this time, I had spent three hours on what was supposed to take 30 minutes, so I decided to postpone the shifter
work for yet another week. I took care of some other things that needed attention like lubing the front
steering and reinstalling the dash pot on the carburetor.
I discovered that the dash pot brackets
on the rebuilt 2300 manual choke and the
NOS 2300C are different lengths. I
swapped them out so the 2300C will now
idle down without snapping the throttle
shut and stalling out. I decided to
adjust the sagging door hinges so
they'll be lined up nice when I replace
the weather stripping. My PB'laster was
put to use again on the stubborn door
hinge bolts. I also put in a 1ga negative battery cable to replace the wimpy 4ga that was too long anyway. I'm going to do the same with the positive cable but I'll probably have to make up my own since 74" 1ga cables are not readily available. I was going to replace the door gaskets but ran out of time (again!). Little by little, things are getting done. Just wish I had more time work on them.
Nov 22, 2003 Finished up installing the new top seals today. They fit perfectly and seal out all the drafts I had been experiencing since I bought the Scout. With all the bolts in place, it also eliminates a lot of the rattles and squeaks. I think I'll do the door gaskets next so I'll have a completely
weather tight ride this winter.
Nov 16, 2003 Got some new travel top seals from
ScoutParts.com and got started putting them on. We do get some rain in Tucson during the winter and I want to make sure I have the Scout "dried in" before they start. I got the top off with the help of some old cable-type camper jacks I had. Those things are scary for lifting a cabover but they handle the travel top just fine. I went to Ace Hardware and got some 5/16 x 24
flange bolts since the top is currently held on by only 3 bolts on each side. I got the top in the air and removed the remnants of the old seal and some kind of caulking that had been used on the windshield frame. Before I could get the new seals on, I had to go help my brother cut down some trees in his yard and haul a load to the dump. By the time I got home, there was only time to clean up before heading to the
Scout Club meeting. I was going to drive the Scout topless but I couldn't get out from under the camper jacks. So I had to lower it back down and bolt it back on for now. Now that I've done it once, I should be able to get the seals on pretty quickly when I get some time. I still need to do something about that transmission shifter!
Nov 8, 2003 I saw a NOS Holley 2300 with automatic choke on Ebay, so I decided to replace the rebuilt 2300 manual choke which I hadn't been able to get running very well. Still had off-idle hesitation and was hard to start. I put on the 2300C and it made a world of difference! No more hesitation and starts right up.
The only problem was that the dash pot
doesn't allow the throttle to close far
enough, even when adjusted all the way
down. I removed it until I can figure
out how to make it work. Now that I don't have to worry about the
engine as much, I can focus on other things on the Scout. Next, I think I'll get the new door and top seals put on so I can stay dry when the winter rains come.
I mounted a pair of tow hooks on the frame horns under the front bumper and changed the fluid in the front diff. I still need to get the new shifter installed. Maybe in a couple of weeks.
Nov 2, 2003 I worked this weekend on getting the Scout to start and run better. I replaced the points and condenser and adjusted the timing. The $8 made-in-Taiwan distributor wrench I got at Checker was well worth the price. The distributor lock bolt is pretty inaccessible, especially with the A/C compressor bracket in the way. The timing was advanced quite a bit and I was getting stalling and backfiring from the carburetor when the throttle was opened fast off idle. Retarding the timing helped quite a bit. I don't know exactly how many degrees retarded it is because I didn't use a timing light. I just rotated the distributor until the idle came up and the stumble/backfire off idle went away. It still started ok so I don't think I retarded it too much.
After I got it to run better, I took it for a spin on a nearby dirt lot and tested the operation of the transfer case in 4H and 4L. Everything seems to work.
I decided to use the rest of my time to remove unwanted parts from the Scout. I started by yanking the York A/C compressor which a PO had already disconnected the hoses from. I discovered that the water pump, alternator and compressor are all driven by the same belt, which is adjusted by moving the compressor. So now I need to figure out a way to adjust the alternator to tighten the belt, which will be a lot smaller without the compressor in the loop. I'll probably have to fabricate some type of adjustable arm for the alternator if I don't replace the bracket altogether.
Next, I removed the heater assembly from the engine compartment. I plan ro reinstall it after I have cleaned it up. I think it needs a new motor anyway. Besides the two bolts in the wheel well, there are 2 bolts holding the assembly to the firewall. One is easily accessed from the engine side. The other is tucked away under the dash behind the duct and blower motor for the dealer installed air conditioner. It was slow going trying to turn the nut 1/8 turn at a time and not being able to reach it with bare fingers. I don't know how it was put on to begin with, but I'll worry about that when the time comes to replace the heater.
Next, I removed the air conditioning condenser, blower and under dash unit from the cab. There's a lot more room under the dash and in the passenger side foot well now. This will make getting to the wiper motors and other stuff behind the dash
much easier.
Oct 12, 2003
I was all ready with a list of projects
for the Scout so I got up bright and
early to get started. The first thing I
wanted to do was put on the rebuilt
Holley 2300 carburetor I had gotten from
Checker
Auto. When I went to start the Scout to move it closer to the garage, the starter stuck and just kept turning over the engine which didn't want to fire. By the time I found a wrench to disconnect the battery, it had run it down to almost dead. I was worried about letting the starter motor run for what seemed like 5 minutes but it was probably only a couple. So after an hour and a half of fiddling with the starter switch and hooking up another battery, I finally got to the carb. Everything went pretty smoothly except I left out the 1/4" spacer that goes between the carb and the intake manifold thinking that all I needed was the gasket that came with the carb. Only trouble with that is that without the spacer, the accelerator pump gets pushed up when you bolt down the carb. When I started the engine, it must have hit about 8000 rpm which is pretty high for any engine, let alone an IH V-8. Sounded like everything was going to come apart. Fortunately, it stalled pretty quickly but I did try it a couple more times before I figured out what the problem was. Nothing like abusing a 33 year old motor. Good thing it's an IH! I had to hook up a cable since the new carb is a manual choke. I haven't figured out where to mount it on the dash so the cable just comes through the firewall and lies across the console for now.
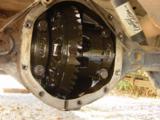
I moved on to my next task which was changing the rear diff fluid. This went pretty well too and I verified that the D-44 is indeed a Powr-Lok after I got the cover off.
Before I forgot it, I mounted my 5 lb fire extinguisher to the roll bar on the driver's side.
My next project was to temporarily attach the spare tire behind the rear seat to keep it from rolling around. First, I had to mount the rear seat to the wheel well covers since it was just sitting loose in the back of the Scout. The 4 bolts were there and tightened down. Of course
only 3 of them came out with little effort. The last one needed lots of
PB'laster and vise grips to get it out. After the seat was secured, I cut some 2x6 scrap lumber to wedge the tire sideways and bungeed it to the seat back frame. That will suffice until I can fabricate a mounting bracket for the tailgate. By this time the day was pretty well over and I was getting tired anyway. I called it quits until the next time I get to work on it.
Sept 16, 2003 I got my 800A Operator's Manual from
Binder Books today. I read the instructions for shifting to 4L and it works fine! It's a two-handed operation that involves moving the transmission selector from D to R while pushing the transfer case lever up towards the 4L position. Not real intuitive. I never would have figured it out without the manual.
Sept 14, 2003 I decided to get the passenger side window back in so the neighborhood cats couldn't piss in the truck. I managed to reinstall the window regulator and secure it with 3 out of 4 screws. I still need a crank handle and a regulator clip but at least it keeps out the elements.
I started to do some more in-depth checking of the truck. It turns out the TC145 (Dana 20) transfer case only shifts to 2H and 4H. It might just be that the linkage needs to be lubed. I was a few blocks from home when I tried it and didn't want to force it in case something broke and/or I got it stuck in N and couldn't get back home. I'll check into it more later.
I took the truck to the neighborhood car wash and sprayed the engine and diffs. The grease is pretty well caked on so it didn't do much good. It's going to take some scraping and elbow grease to get it cleaned up good. I parked the truck and put a piece of cardboard underneath overnight. I didn't see any
major
drips the next day! That's a good sign. At least there's no major oil leaks.
I found that the
wheel
bolt pattern is the same as F**d light trucks/Br*nc*s. I have four of them lying around from a previous project, so I threw one in the back for a spare. Need to fabricate some kind of hold-down so it doesn't roll back and forth.
I changed the oil and filter and called it good for the day.
Sept 10, 2003 Took the truck to get the title transferred. Had to go through ADEQ emissions testing first since it's a 1970 and the cutoff for exemption is 1966. I was a little worried but it passed OK! Went next door to the Arizona MVD and got my new plates and title.
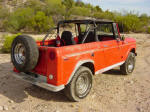
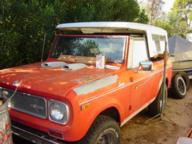
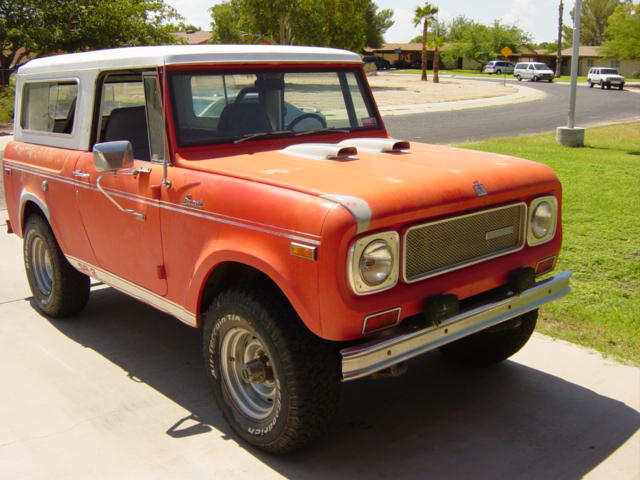
As purchased September 9, 2003
 |